Cognitive biases in UX influence our design decisions far more than we realize. It’s estimated there are over 180 types of cognitive biases that affect how we think and make choices. Despite our best intentions to create user-centered designs, these mental shortcuts can lead us astray.
Our brains use these shortcuts to navigate the complex world we live in, making quicker inferences and faster decisions. However, this efficiency comes at a cost. For example, in one study, practitioners who saw the same design finding described as a failure rate were 31% more likely to recommend a redesign than those who saw it presented as a success rate. This striking difference illustrates the power of framing bias in our design process.
As UX designers, understanding these psychological patterns is crucial. Cognitive biases result from systematic erroneous thinking, and when we build product requirements based on biased research, we risk reaching incorrect conclusions that don’t represent true user needs. In fact, researchers Tversky and Kahneman found that framing identical information differently can lead to completely opposing decisions.
In this article, we’ll explore the most common cognitive biases affecting UX design, how they impact our research and design decisions, and practical ways to reduce their influence on our work.
What are cognitive biases in UX design?
The human mind processes an enormous amount of information daily, making it impossible to thoughtfully analyze every decision. Cognitive biases in UX design are systematic thinking patterns that affect how both designers and users interpret information, make decisions, and interact with digital interfaces.

How our brains use shortcuts to make decisions?
Fundamentally, our brains rely on mental shortcuts called heuristics to navigate complexity without getting overwhelmed. These shortcuts enable us to process information and take action almost immediately, often without conscious awareness. Initially developed as efficiency mechanisms, heuristics help with smaller, unnoticeable decisions using past information while minimizing cognitive strain. Rather than weighing all available data, we use these mental pathways to make rapid judgments based on limited information.
Think about the last time you visited a website—you likely didn’t analyze every element on the page. Instead, you scanned for familiar patterns and made quick assumptions about how things should work.
Why these shortcuts can lead to flawed UX choices?
Although heuristics increase decision-making efficiency, they frequently lead to errors and flawed UX choices. Cognitive biases create rigid, unhelpful beliefs that can distort our perception. Consider confirmation bias, where designers favor information that reinforces pre-existing beliefs while dismissing contradictory evidence. Additionally, research by Tversky and Kahneman demonstrated that framing identical information differently can lead to completely opposite design decisions.
These biases affect both sides of the UX equation:
- Designers make subjective choices regardless of user benefit
- Users form judgments based on their own internalized biases
The role of psychology in UX design
Understanding psychological principles has become essential in creating intuitive, user-friendly products. Cognitive psychology helps designers predict potential user errors, highlight appropriate actions, and create seamless experiences. Moreover, psychological knowledge provides valuable insights into user behaviors, enabling designers to develop more effective solutions.
The human experience isn’t just about completing tasks—it involves emotions, attitudes, and behaviors that significantly impact satisfaction. Consequently, psychological aspects cannot be separated from material design elements. By understanding cognitive biases, designers can better anticipate how users will perceive and interact with interfaces, ultimately creating more intuitive and satisfying experiences.
8 hidden cognitive biases every UX designer should know
Behind every design decision lurk invisible mental shortcuts that shape our work. Understanding these cognitive biases in UX design can mean the difference between creating intuitive experiences and frustrating ones.
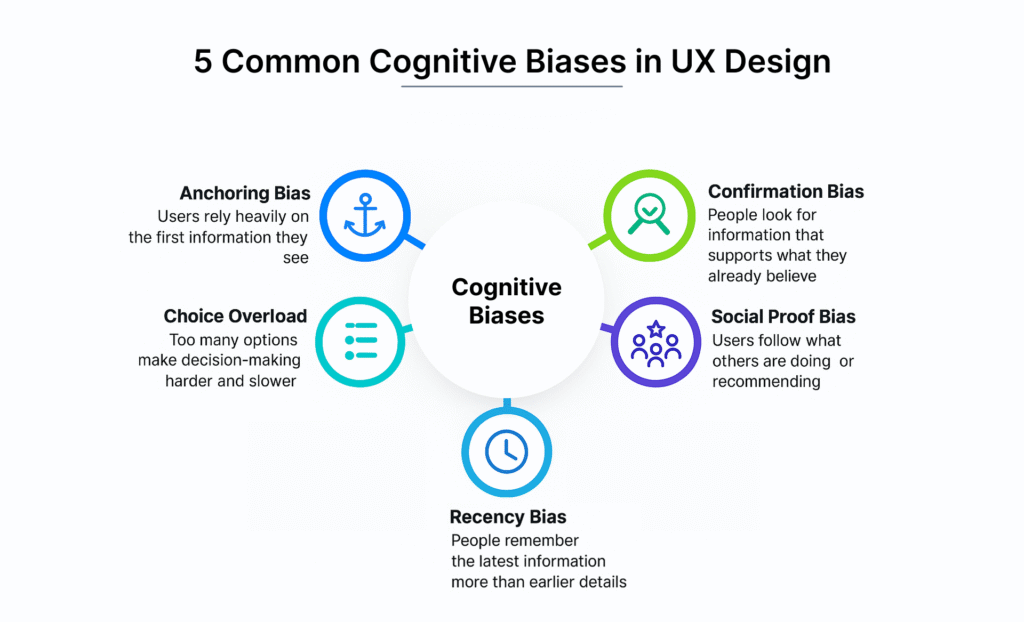
1. Confirmation bias
This bias causes us to favor information that supports our existing beliefs while dismissing contradictory evidence. UX designers frequently seek data that validates their design decisions rather than challenging them. Studies show this bias grows stronger the more emotionally invested you are in your design solution, making it particularly dangerous during usability testing.
2. Anchoring bias
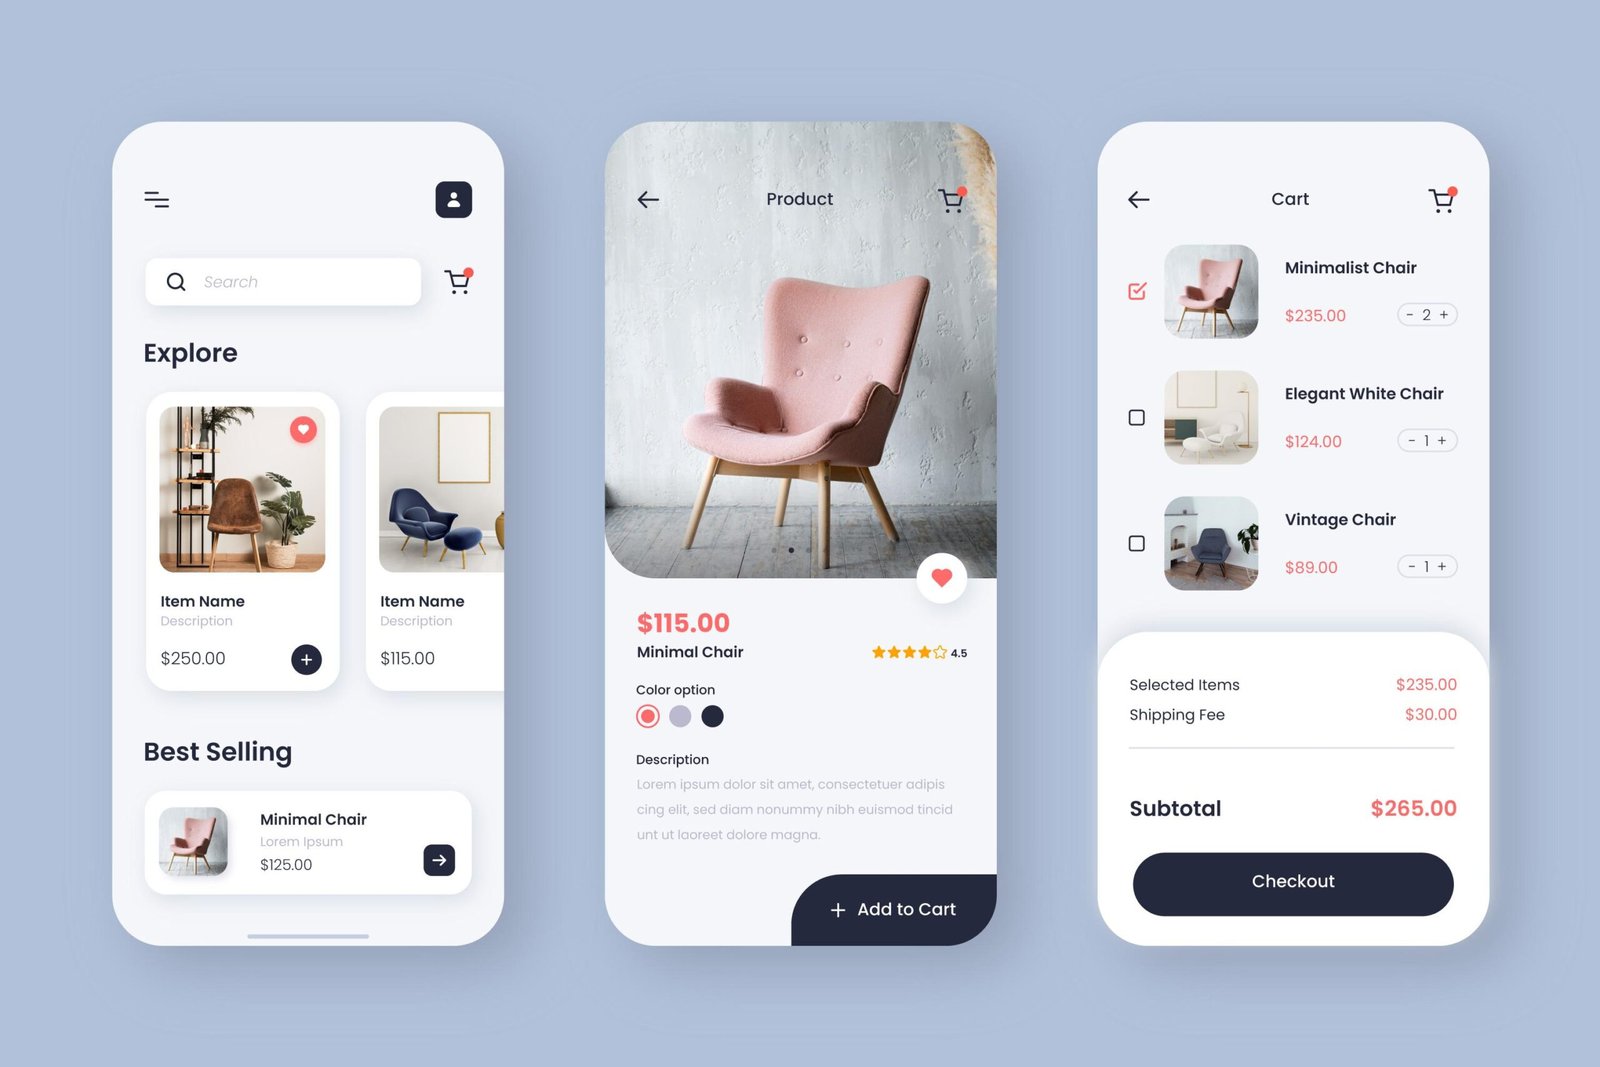
Anchoring occurs when we rely too heavily on the first piece of information encountered. In UX, the initial price shown, first search result, or default option can set a powerful reference point that influences all subsequent user decisions. For example, if a website displays a premium plan first at ₹16,791, users may perceive a ₹8,353 plan as more reasonable, even if both are expensive.
3. Framing bias
How information is presented significantly impacts perception and decisions. Remarkably, practitioners who saw identical design findings framed as a failure rate were 31% more likely to recommend a redesign than those who saw it presented as a success rate. This demonstrates how framing affects both users’ choices and designers’ interpretations.
4. False consensus bias
This bias leads designers to overestimate how many users share their preferences. First identified in 1977 by Ross and colleagues, research showed people expect the majority to make the same choice they would make. In UX, this manifests as designers assuming their own preferences represent typical user behavior.
5. Serial position effect
The primacy effect (better recall of items at the beginning of a list) and recency effect (better recall of items at the end) combine to create this phenomenon. Items in the middle receive less attention and are harder to recall. Research by Ebbinghaus demonstrated this bias affects how users remember navigation items and menu options.
6. Social desirability bias
During user research, participants often provide responses they believe will be viewed favorably. This bias particularly affects research on socially acceptable behaviors, leading to skewed feedback that doesn’t reflect genuine user experiences.
7. Peak-end rule
Kahneman and Frederickson found people remember experiences based primarily on the most emotionally intense moments (peaks) and how they ended, rather than the average experience. In UX design, this means the most frustrating moment and final interaction heavily influence overall user satisfaction.
8. Availability bias
Introduced by Tversky and Kahneman, this bias causes us to rely on easily recalled information rather than comprehensive data. Designers often focus on the most recent user feedback or memorable experiences instead of considering the full range of user insights.
How cognitive biases affect UX research and design decisions?
Cognitive biases don’t just influence our thinking they systematically warp UX research at every stage of the design process. These unconscious patterns can completely derail otherwise well-planned projects.
Bias in user interviews and surveys
During user research, confirmation bias often leads researchers to only gather information that confirms their existing beliefs. Researchers may unconsciously ignore valuable feedback that contradicts their assumptions. Furthermore, social desirability bias causes participants to provide answers they believe will be viewed favorably, especially when discussing products with social capital attached. This results in artificially positive feedback that doesn’t reflect genuine user experiences.
Skewed data from poor participant selection
Selection bias occurs when research participants aren’t representative of actual users. This commonly manifests as sampling bias, where teams recruit specific individuals while disregarding others who don’t fit their unconscious expectations. Subsequently, if someone holds an unvalidated belief about users from a specific market, it might lead to recruiting only those people—creating a domino effect of flawed conclusions from the start.
Misleading conclusions from biased reporting
The framing effect significantly impacts how findings are interpreted. Notably, the same data presented differently can lead to opposite conclusions—for instance, reporting “40% of users couldn’t find what they needed” versus “60% had no issues”. Clustering illusions cause researchers to see patterns in random data, especially when working with small sample sizes.
Impact on product features and prioritization
Ultimately, these biases lead teams to “build the wrong thing(s),” resulting in:
- Decreased product usage and increased user churn
- Wasted time, money, and resources on features that don’t meet actual user needs
- Solutions addressing incorrect problems
To identify potentially biased insights, triangulate qualitative feedback with quantitative data to check for inconsistencies between what users say and what the data shows they actually do.
How to reduce bias in your UX process?
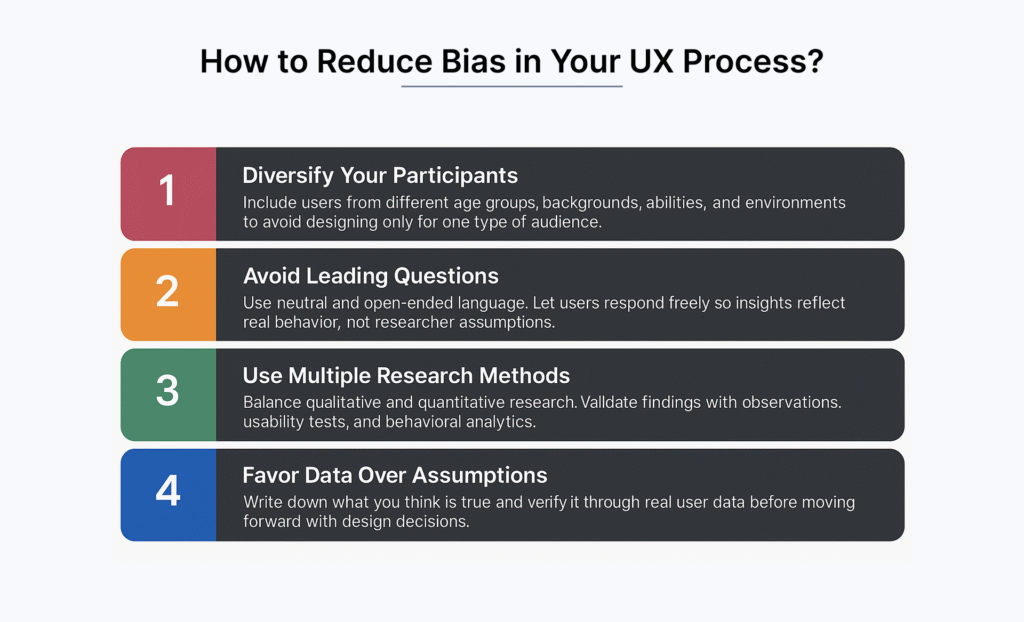
Reducing cognitive biases requires deliberate strategies throughout your UX process. By implementing these practices, you can minimize bias in your UX research and design decisions.

Use neutral and open-ended questions
The way you phrase questions directly impacts what insights you’ll uncover. Open-ended questions encourage exploration and often reveal surprising mental models that closed questions would miss. Avoid leading questions that suggest an answer or prime participants to volunteer specific information. Instead of asking “Did you like the product?” try “What did you think about the product?”
Involve multiple researchers in analysis
Investigator triangulation incorporates multiple researchers into your study, each bringing unique perspectives and expertise. This approach significantly reduces individual biases that could influence outcomes. When researchers reach the same conclusions independently, it greatly improves the credibility of findings.
Triangulate qualitative and quantitative data
Triangulation means applying multiple research techniques to overcome the limitations of any single method. By combining qualitative insights (like interviews) with quantitative data (such as analytics), you validate findings across different sources. This approach provides a more comprehensive understanding and increases confidence in your results.
Test with diverse user groups
Include users with various backgrounds, abilities, and experiences in your research. Five participants might highlight general patterns, yet won’t uncover the full range of issues—basic thinking-aloud studies need 8-12 participants. Remember that certain users might not use your product because their needs haven’t been discovered through diverse testing.
Be aware of your own assumptions
Actively seek diverse perspectives and ground decisions in user research rather than personal opinions. Regularly question initial assumptions throughout the design process, ensuring decisions stay focused on user needs. Collaborate with colleagues from different disciplines to introduce fresh viewpoints that challenge biased assumptions.
Conclusion
Cognitive biases significantly shape how we design and how users interact with our products. Throughout this article, we’ve seen how these mental shortcuts influence decisions at every stage of the UX process. Undoubtedly, recognizing these biases marks the first step toward mitigating their impact on our work.
The eight biases we explored – confirmation, anchoring, framing, false consensus, serial position effect, social desirability, peak-end rule, and availability – represent just a fraction of the 180+ cognitive biases affecting human thinking. Still, awareness of these common biases equips us to design more thoughtfully and conduct research more objectively.
Beyond simply identifying these biases, we must actively work against them. This requires implementing strategies like using neutral questioning techniques, involving multiple researchers, triangulating different data types, testing with diverse user groups, and constantly challenging our assumptions. These practices help ensure our design decisions genuinely address user needs rather than merely confirming what we already believe.
The psychological aspects of UX design cannot be separated from the technical elements. After all, great design accounts for human psychology, including the biases and mental shortcuts users employ while interacting with our products. Similarly, we must acknowledge our own biases as designers to prevent them from steering us toward flawed solutions.
Cognitive biases will never completely disappear from our thinking. Nevertheless, conscious effort to recognize and counteract them transforms us into better designers who create more intuitive, satisfying experiences. The next time you make a design decision or conduct user research, pause and ask yourself: “Which cognitive biases might be influencing this process?” This simple question might save your team from building the wrong thing, wasting resources, or missing crucial user insights.
Key Takeaways
Understanding cognitive biases is essential for creating user-centered designs that truly serve your audience’s needs rather than confirming your assumptions.
• Recognize the 8 critical biases: Confirmation, anchoring, framing, false consensus, serial position effect, social desirability, peak-end rule, and availability bias all distort UX decisions.
• Implement bias-reduction strategies: Use neutral questions, involve multiple researchers, triangulate data sources, test with diverse users, and constantly challenge your assumptions.
• Question your research methods: Biased participant selection and leading questions can completely invalidate your findings, leading to products that don’t meet real user needs.
• Frame information carefully: How you present data dramatically impacts decisions—identical findings can lead to opposite conclusions based on framing alone.
• Triangulate your insights: Combine qualitative feedback with quantitative data to validate findings and catch inconsistencies between what users say and actually do.
The cost of ignoring cognitive biases is building the wrong features, wasting resources, and creating frustrating user experiences. By actively working against these mental shortcuts, you’ll make more objective design decisions that genuinely solve user problems.
FAQs
Q1. What are cognitive biases in UX design?
Cognitive biases in UX design are systematic thinking patterns that affect how designers and users interpret information, make decisions, and interact with digital interfaces. These mental shortcuts can lead to flawed design choices and misinterpretation of user needs.
Q2. How do cognitive biases impact UX research?
Cognitive biases can skew UX research by influencing user interviews, participant selection, data interpretation, and feature prioritization. This can result in misleading conclusions, wasted resources, and products that don’t effectively address user needs.
Q3. What are some common cognitive biases UX designers should be aware of?
Key cognitive biases for UX designers to understand include confirmation bias, anchoring bias, framing bias, false consensus bias, and the serial position effect. These biases can significantly influence design decisions and user interactions.
Q4. How can UX designers reduce the impact of cognitive biases in their work?
To minimize cognitive biases, UX designers can use neutral and open-ended questions in research, involve multiple researchers in analysis, triangulate qualitative and quantitative data, test with diverse user groups, and actively challenge their own assumptions throughout the design process.
Q5. Why is understanding cognitive biases important for UX design?
Understanding cognitive biases is crucial for creating truly user-centered designs. It helps designers make more objective decisions, conduct more effective research, and ultimately create products that better meet user needs and provide more satisfying experiences.


