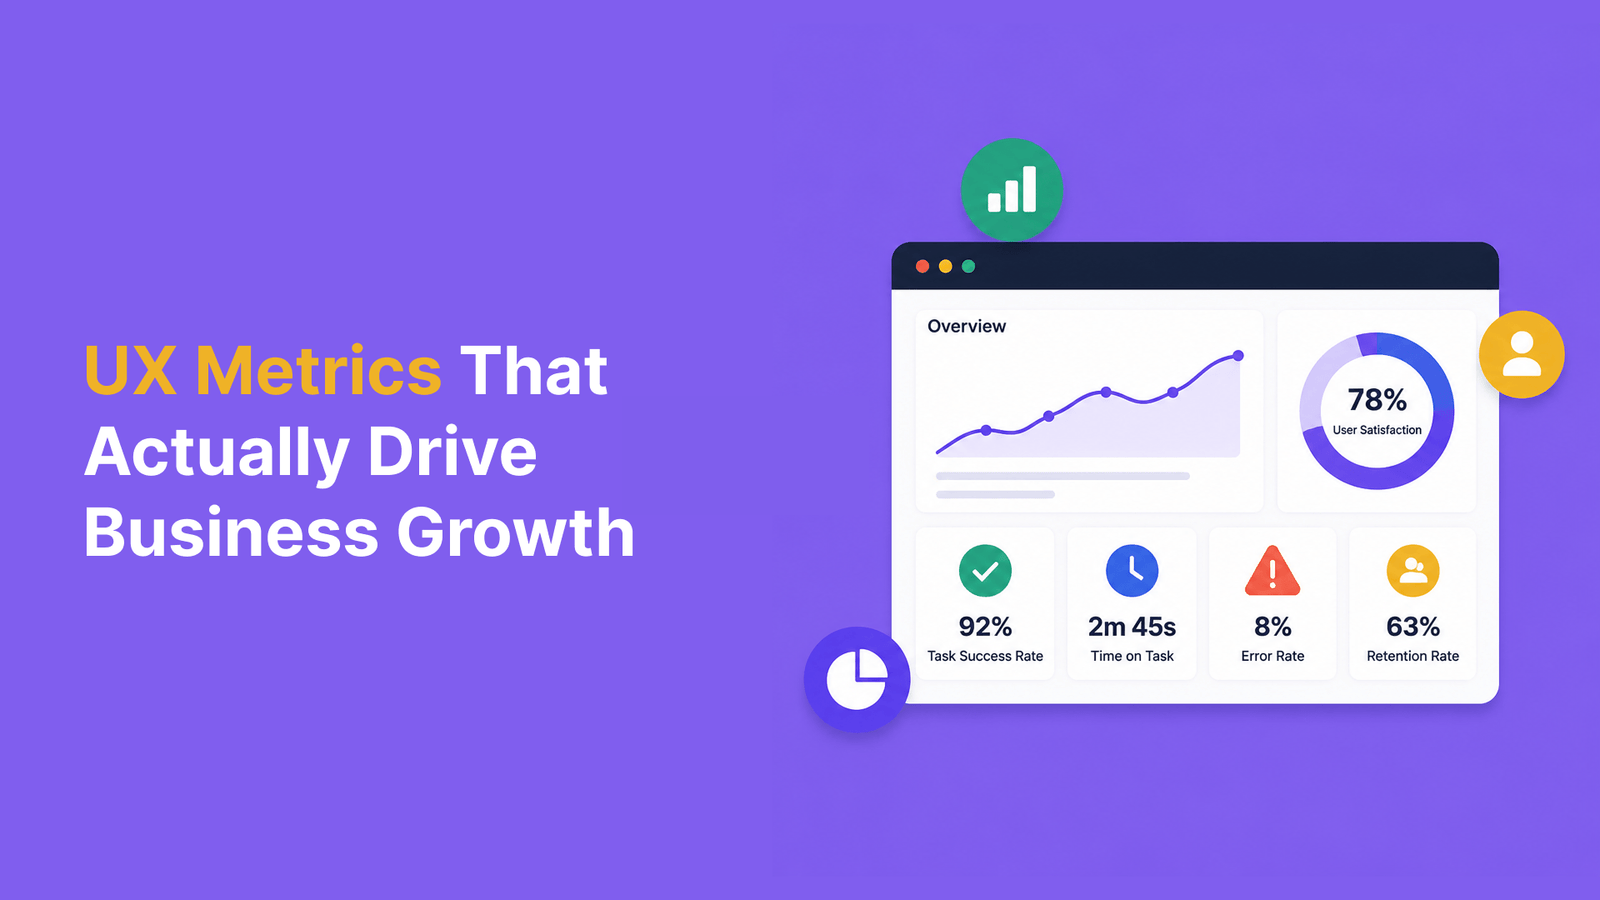
App UX determines your business success in today’s digital world. Walker’s ‘Customers 2020’ report shows that customer experience will surpass price and product as the main brand differentiator. The numbers make sense – sites with superior user experience achieve visit-to-lead conversions up to 400% higher than others.
Real-world results prove that app UI UX design investments pay off remarkably. Intechnic’s research reveals every $1 invested in good UX yields $100 in return. Poor UX causes businesses to lose 35% of sales. Mobile internet traffic now makes up nearly 60% of all internet usage, and mobile app UX design has become crucial.
Our team’s 20 key tips will help revolutionize your web app to improve the UX design. These mobile app UX best practices cover navigation, load times and help create the best UI app possible. Research shows 84% of companies plan to focus more on customer experience metrics. Keeping up with trends isn’t optional – your business survival depends on it.
Navigation is the backbone of any digital product. It acts as a highway for users to find what they need. Research shows that 38% of consumers look at navigational links and layout the first time they visit a site. A simple navigation system creates an exceptional app UX.

Explanation of Simplified Navigation
Simple navigation creates easy-to-use, straightforward paths that help users move through an app quickly. Users feel more comfortable and confident with clear paths and simple menus. The cognitive load reduces when navigation is simple, which lets users focus on their tasks instead of learning how to use your app.
Real-life example of Simplified Navigation
Apple shows us minimalist navigation with its optimized horizontal navigation bar. The bar shows distinct product categories that give users an easy browsing experience. Duolingo uses a bottom navigation menu with just four greyscale icons that turn blue when selected. The screen name appears only under the active icon.
How to apply Simplified Navigation?
Your mobile app UX design needs these navigation principles:
- Keep primary navigation menu items between 5-7 options. This follows the “seven plus or minus two” rule
- Simple, familiar labels work better than jargon or creative terms
- Touch targets should be at least 44×44 pixels so users can tap easily
- Navigation should stay consistent, usually at the screen’s top or bottom
- Related items need logical grouping to create meaningful categories
Common mistakes with Simplified Navigation
Designers often make these critical mistakes that hurt app UI UX design:
- The main menu becomes overwhelming with too many options
- Navigation changes between screens confuse users
- Icons take more than 5 seconds to understand
- Desktop designs hide menus behind hamburger icons despite having enough space
- Users can’t tell where they are in the app
Focus on One Action per Screen
Complex interfaces overwhelm users and make it hard to complete tasks. The “one action per screen” principle creates a focused experience that naturally guides users through your app’s workflows.

Explanation of Single Action Focus
Single action focus helps you design each screen with one main goal or task and removes distractions that could derail users. This approach reduces cognitive load by breaking complex processes into manageable pieces. Focused interfaces help users achieve a state of “flow” – complete immersion in an activity where productivity meets satisfaction. Research shows that single-column layouts outperform multicolumn designs for form completion rates.
Real-life example of Single Action Focus
Shopify shows this principle at work in their onboarding process. They break tasks into separate screens that users can easily manage. E-commerce apps often use step-by-step checkout flows where they divide the complex task of completing a purchase into smaller, focused screens. This approach makes the process simple and connects activities like browsing and purchasing through logical steps.
How to apply Single Action Focus?
Here’s how to use this principle in your mobile app UX design:
- Keep one or two tasks per screen to maintain simplicity
- Split complex tasks (like checkout or registration) into smaller subtasks
- Make the primary action stand out, with secondary actions less prominent
- Ask for only one piece of information per screen during critical flows like onboarding
- Show only what’s relevant to the current task through progressive disclosure
- Make each call-to-action clear and visible without scrolling
The main goal is to create an environment where users can focus on each task without distraction. Users don’t mind multiple screens as long as each step moves them toward their goal and shows progress.
Reduce UI Clutter
“Rule of thumb for UX: More options, more problems.” — Scott Belsky, Chief Product Officer, Adobe; Founder of Behance
Visual clutter in interfaces works as a silent saboteur of user experience. It becomes a main obstacle between users and their goals. Research shows cluttered screens hurt performance and result in higher error rates and longer response times.

Explanation of UI Clutter
UI clutter means too many unnecessary visual elements that increase users’ cognitive load. It represents an abundance of irrelevant information, poor display organization, and visual noise that makes users work harder to complete tasks. Studies using fMRI show the brain’s ability to process information becomes limited and users lose focus. This reduced processing power guides users to frustration and overwhelms them, especially when they have simple tasks to complete.
Real-life example of UI Clutter
Financial dashboards often show UI clutter problems clearly. A study with insurance agents found that there was a need for totals from just five categories in entire financial reports to make decisions. Yet the interfaces showed excessive data that stymied rather than helped. Apple’s products offer a clean contrast by using limited colors and ample whitespace to let content breathe.
How to reduce UI Clutter?
Your mobile app UX design can be decluttered by:
- Prioritize content by identifying must-have vs. extra information, then show/hide so
- Increase whitespace between elements to boost readability and focus
- Limit your color palette to 2-3 colors to boost visual harmony
- Remove decorative elements that don’t help achieve user goals
- Make content visually prominent while labels and borders visually recede
Note that decluttering doesn’t mean oversimplifying. An interface that’s too simple can make it hard for users to understand your application’s purpose. Creating a frictionless design remains the ultimate goal to achieve simplicity of interaction.
Prioritize Key Content
Your app’s UX success depends on smart content prioritization that guides users to what matters most. Modern users tend to scan content rather than read it in detail.

Explanation of Key Content Prioritization
Smart content arrangement puts vital information where it catches the eye. This helps users quickly scan instead of trying to memorize details. Studies reveal that Western users follow specific scanning patterns. They use either an F-pattern (top-to-bottom, left-to-right) or Z-pattern (top-left → top-right → bottom-left → bottom-right). The right prioritization creates a natural hierarchy that lets users spot key information fast.
Ground example of Key Content Prioritization
Airbnb shows great content hierarchy. Their menu clearly separates main categories (Stays, Experiences) from support links (Help, Account settings), which makes scanning easy. Apple’s website takes a similar approach with bold product images, punchy taglines, and CTAs placed where eyes naturally land.
How to prioritize Key Content?
Here’s how to build an effective content hierarchy in your mobile app UX design:
- Put must-know information at the top using the “inverted pyramid” approach
- Make important elements stand out with size contrast (3:1 ratio between headers and body text)
- Keep related items together in common areas to boost clarity
- Use proper heading structure (H1→H2→H3) to make content easy to read
- Watch how users behave to decide which content needs highlighting
Design for Human Fingers
Mobile interfaces shape our daily interactions, but designers often miss a crucial element – our fingers. Physical constraints demand careful planning to create accessible experiences.
Explanation of Finger-friendly Design
Finger-friendly design adapts interfaces to match human digit dimensions. MIT Touch Lab research shows that index fingertips measure 16-20mm (45-57 pixels) wide. Thumbs are larger at 25mm (72 pixels). Platform guidelines often suggest smaller targets, which creates a gap between human anatomy and interface design.
Ground example of Finger-friendly Design
Instagram’s story interface showcases excellent finger-friendly design through large tap zones that match natural thumb movements. The Glow Baby app’s thumb-friendly timers measure 2.3cm wide and provide enough space between targets.
How to design for fingers?
These guidelines help create finger-friendly interfaces:
- Touch targets should measure at least 48×48dp (9mm) to ensure comfortable tapping
- Space between touch targets needs a minimum of 8dp to avoid mis-taps
- “Thumb zones” matter – they’re areas users can reach easily with one hand
- Visual feedback should appear instantly after touch to confirm actions
- Gaming apps and moving applications need larger target sizes
- Users should test the interface in everyday situations – while walking, commuting, or relaxing
Follow UX Design Conventions
UX design conventions act as a silent bridge between users and interfaces. These proven patterns help users direct themselves through apps naturally without learning new behaviors for each interaction.

Explanation of UX Conventions
UX conventions represent design norms and practices that users already know and expect. Standard element positions like logos in the upper left corner, familiar icons such as a magnifying glass for search, and consistent directional patterns make up these conventions. Users face less mental strain because they can rely on what they already know instead of learning something new.
Ground Examples of UX Conventions
Airbnb shows a perfect blend of conventions in action with its user-friendly design that earned a Webby Award. The app strikes an ideal balance – it looks great without sacrificing ease of use. Uber’s app design also stands out for its simplicity, with recognizable icons and smart placement of essential elements.
How to apply UX Conventions?
Your app’s UX needs these proven conventions:
- Pick widely known icons (envelope for messaging, hamburger for menu)
- Put navigation elements in expected spots (login/cart in upper right)
- Mix fresh ideas with familiar patterns—only break conventions to improve experience
- Let real users try your design to check if they understand your conventions
- Keep your app’s design consistent to build trust
Note that conventions exist with good reason too—they help users reach their goals quickly. This doesn’t mean creativity takes a back seat. Success lies in finding the sweet spot between fresh ideas and proven patterns.
Improve Readability
Readability revolutionizes regular interfaces into exceptional app experiences. Your users should easily understand and process text on screen. Legibility helps distinguish individual letters, while readability makes content comfortable to read and understand.
Explanation of Readability in UX
Text presentation directly affects your users’ cognitive load. Research shows small font size and low contrast top the list of web users’ complaints. Small changes make big differences – a study showed better conversions after font size increased from 10 to 13 pixels. Line spacing set to 2.5 helps all but one of these users read better, particularly those with visual impairments.
Ground example of Readability
Airbnb shows excellent readability principles. They break text into scannable paragraphs, use clear typography hierarchy, and keep good contrast between text and background. Their users typically skim content instead of reading everything.
How to improve Readability?
Your mobile app UX design needs these elements to boost readability:
- Simple, recognizable fonts (sans-serif for headlines, serif for body content)
- Optimal line length (45-72 characters per line)
- Left-aligned text instead of justified or center-aligned
- Proper spacing (line height approximately 1.5)
- Short paragraphs (2-3 sentences maximum)
- Clear visual hierarchy with proper headings and subheadings
- Content at 8th-grade reading level works best for a variety of users
Optimize Load Time
Load times can make or break your app’s success. Even a few milliseconds of delay will affect user retention and revenue. Research proves that a 100-millisecond reduction in page load time can boost conversions by 1.11%. A one-second improvement pushes conversions up by 2%.

Explanation of Load Time Optimization
Load time optimization aims to cut down the gap between app launch and full interactivity. Two key metrics define this timeframe: Time to Initial Display (TTID) and Time to Fully Drawn (TTFD). TTID measures how fast your app shows its first frame. TTFD tracks when the app becomes fully usable, including content loaded asynchronously.
Real-life example of Load Time Optimization
Tinder’s progressive web app cut load times by 61%, dropping from 11.9 to 4.6 seconds. This improvement led users to edit profiles more on their web platform than native apps. Flipkart’s PWA showed similar success with 3x higher conversion rates and 38% faster page loads.
How to optimize Load Time?
Your mobile app’s UX will improve with these steps:
- Lazy load non-essential resources
- Compress and optimize media files
- Merge separate files to reduce HTTP requests
- Cache unchanging elements on user devices
- Use Content Delivery Networks (CDNs)
- Remove unnecessary characters and spaces from code
Personalize the User Experience
Personalization changes generic applications into individual-specific experiences and redefines how users connect with digital products. Research shows that companies who excel at personalization generate 40% more revenue from these activities than average players.
Explanation of UX Personalization
UX personalization adapts digital experiences to match users’ specific requirements, priorities, behaviors, and environments. It goes beyond showing a username to create interfaces that respond to individual needs. This approach makes use of information like location, device type, browsing history, and in-app behavior to deliver relevant content. Studies show that 71% of consumers now expect personalized interactions. The right personalization creates experiences that feel like partners rather than tools.
Real-life example of UX Personalization
Pinterest shows excellent personalization by combining user-provided data with localization. Users answer preference questions during signup that work with location data to create tailored recommendations. Their system delivers relevant content right away, and personalization gets better with each session. Headspace understands meditation’s personal nature and builds app meditation plans around individual users through onboarding questionnaires about specific goals.
How to personalize UX?
These steps help implement personalization in your mobile app UX design:
- Capture essential user data through welcome surveys and behavior tracking
- Group users based on behavior patterns and priorities
- Add location-based customization for relevant local content
- Create personalized onboarding flows for different user segments
- Set up milestone achievements with rewards to boost engagement
- Send customized notifications based on user behavior patterns
Personalization should feel natural, not intrusive. Your app must be transparent about data collection practices and give users control over their personalized experience. Note that personalization isn’t just a trend—it represents a transformation in how users expect to interact with applications.
Ensure Design Consistency
Consistency builds the invisible framework that holds great app UX together and unites all design elements into a seamless experience. Users who see consistent design patterns need less mental effort to understand how things work. They can focus on their goals instead.

Explanation of Design Consistency
Design consistency means using uniform visual language, layout patterns, and interaction methods across your application. It creates predictable experiences that build user’s trust and familiarity. Design consistency includes these key areas:
- Visual consistency – uniform colors, typography, and imagery
- Functional consistency – interactions that behave predictably
- Internal consistency – patterns within your own app
- External consistency – arrangements with platform conventions
Inconsistent design creates confusion and forces users to learn new interactions on each screen. Poor consistency hurts brand perception and drives up support costs when users struggle to navigate.
Real-life example of Design Consistency
Airbnb shows excellence in design consistency with its cohesive visual design—standardized icons, unified color palette, and consistent typography. Spotify keeps a cohesive look across its app interface and enhances user experience with recognizable patterns.
How to ensure Design Consistency?
These steps help maintain consistency in your mobile app UX design:
- Create detailed style guides and design systems
- Build component libraries with reusable elements
- Review designs to spot inconsistencies
- Build strong designer-developer partnerships
- Use versioning to update your design system systematically
Consistency needs intentional planning and regular maintenance. Design teams should audit consistency to catch differences in visual elements, typography, and spacing quickly.
Reduce Friction in User Flows
Poor conversion rates often result from user friction that creates barriers between users and their goals in your app. Studies show that 77% of daily active users abandon apps within just three days of installation. This happens because friction points prevent them from completing tasks.

Explanation of UX Friction
Your app’s user friction covers everything that stops users from accomplishing their desired actions. This resistance demonstrates itself in three main forms:
- Emotional friction: Users experience negative feelings like frustration or confusion while using your app
- Interaction friction: The interface becomes confusing or difficult to use
- Cognitive friction: The interface doesn’t work as expected and requires too much mental effort
Users show these friction points through rage clicks, dropoffs, dead clicks, error clicks, and cursor thrashing.
Ground Example of UX Friction
Checkout processes in e-commerce apps often create friction points. Data shows that about 64% of users abandon typical SaaS signup flows. On top of that, 27% of users leave forms because they look too long. Small glitches make users doubt the app’s reliability and safety.
How to reduce UX Friction?
Your mobile app’s UX design needs these friction-reducing steps:
- Religiously reduce steps – Cut down processes to essential steps, even if you must sacrifice some functionality
- Fill empty states with educational content or placeholder data
- Use checklists and progress bars to keep users focused
- Implement tooltips to provide contextual support
- Design consistent interfaces throughout the user experience
Note that extra steps can make valuable features useless in practice.
Ensure Accessibility for All Users
“When UX doesn’t consider ALL users, shouldn’t it be known as ‘SOME User Experience’ or… SUX?” — Billy Gregory, Senior Accessibility Engineer, The Paciello Group
Your app should be designed to help all users interact meaningfully, whatever their abilities. About 15% of the world’s population—approximately one billion people—lives with some form of disability. A user-friendly app experience isn’t just ethical—it’s crucial for business success.

Explanation of Accessibility
People with a variety of abilities—cognitive, physical, visual, or auditory—should be able to use your product effectively. Good design choices that help people with disabilities often improve experiences for everyone. To name just one example, clear directional elements help both visually impaired users and those who use your app in bright sunlight.
Ground example of Accessibility
Apple shows its steadfast dedication to accessibility through VoiceOver, a screen reader that helps visually impaired users direct their iOS devices through gestures and speech. Microsoft’s Xbox Adaptive Controller also proves how accessible design can reach users who were previously left out.
How to ensure Accessibility?
Your app becomes more available when you:
- Keep minimum color contrast ratios at 4.5:1 for normal text and 3:1 for large text
- Create touch targets of at least 44×44 pixels for smooth interaction
- Let text resize up to 200% without breaking layouts
- Add multiple feedback modes (visual, haptic, audio) for important actions
- Check compatibility with assistive technologies like screen readers
- Split complex tasks into manageable steps for cognitive accessibility
Provide Real-time Support
Modern users expect immediate help within applications. Real-time support has become a significant part of effective app UX. Today’s customers want more than basic support—they need instant and contextual assistance.
Explanation of Real-time Support
Real-time support gives users immediate help right inside your application interface. Users receive assistance without leaving their current task. This eliminates the frustration of platform switching and delayed responses. The support system includes:
- Live chat widgets that provide personal human assistance
- AI-powered chatbots available 24/7
- In-app resource centers with searchable knowledge bases
- Smart tooltips and contextual guidance
Real-life example of Real-time Support
Sophos created an in-app resource center that shows relevant help based on user type and location within their products. Their team saved over 1000 hours in support time annually. PlanetHS reduced over 190,000 user tickets by adding smart tips and guided flows in their interface.
How to implement Real-time Support?
Your mobile app UX design needs these real-time support features:
- Chat widgets placed strategically for easy access
- AI chatbots that handle common questions first
- A complete resource center with searchable help content
- Analytics that spot common issues and provide proactive guidance
- Support options that remain visible without disrupting the interface
Foster In-app Communities
Social connections shape how people behave in digital spaces. This makes in-app communities a powerful tool that improves user experience. These social ecosystems change how users interact with your product.
Explanation of In-app Communities
In-app communities give users dedicated spaces to express ideas and share experiences. People form meaningful connections around your product’s purpose. These communities turn one-way interactions into dynamic two-way conversations. Companies that build these communities see impressive results – 40% better retention, 35% more involvement, 30% faster growth, and 2.8x higher revenues. Users stay loyal because they connect emotionally with other users who share their interests.
Real-life example of In-app Communities
Strava shows how communities work by letting users join interest-based clubs, share achievements, and take part in challenges. On top of that, Spotify’s “Wrapped” feature turns listening data into shareable moments that users look forward to each year. LEGO’s Ideas platform lets fans submit concepts and vote on proposals. They’ve grown to over a million users with 26,000 product ideas and 28 produced sets.
How to encourage In-app Communities?
Your mobile app UX design needs these elements to build strong communities:
- Customized user profiles that give members unique identities
- Activity feeds that show recent posts and trending topics
- Dedicated spaces for focused discussions through forums or groups
- Video elements like live streams that connect users immediately
- User-generated content that provides fresh promotional material
Design for Security and Trust
Trust acts as a hidden currency in digital interactions, and security is a vital part of effective app UX. Users expect proper protection and accessible interfaces at the time they share sensitive information with your application.
Explanation of Secure UX
Secure UX blends protection mechanisms with usability. Security becomes part of the user experience instead of being a separate technical concern. This approach creates a balance between convenience and protection. Users will leave applications they see as unsafe, whatever the functionality. A detailed identity security solution can reduce friction during user trips while you retain control of strong protection.
Real-life example of Secure UX
Trusted User Interface (TUI) shows advanced secure UX by taking control of device screen and touch sensors at the hardware level. This protection stops malware from capturing the screen or simulating touches, even on compromised devices. Apple shows this concept through features like isolated secure environments that protect users without affecting their experience.
How to design for Secure UX?
To create security-focused app UX design:
- Ask for minimum needed permissions and release them after use
- Keep private data only in internal storage
- Create clear privacy policies with visual summaries that users understand
- Add biometric authentication with traditional methods
- Include visual security indicators that show protected states
- Build a distinct brand identity to stop phishing attacks
Support Multiple Screen Orientations
Mobile app experiences stand out when they adapt naturally to different device orientations. Users expect their interface to adjust smoothly as they rotate their devices.

Explanation of Screen Orientation
Screen orientation defines how your app interface switches between portrait (vertical) and landscape (horizontal) modes. Good orientation support needs more than simple rotation – it requires complete layout adjustments. Apps could previously restrict orientation, but Android 16 removed this option and now requires orientation adaptation for screens ≥600dp. This change reflects users’ expectations that apps should work well whatever way they hold their devices.
Real-life example of Screen Orientation
FlipaClip shows excellent orientation-responsive design. The app’s tablet users grew by 54% in four months after it optimized for multiple form factors. E-commerce apps also demonstrate this by using step-by-step checkout flows that adapt to different orientations. This approach keeps purchase paths clear while using screen space effectively.
How to support Screen Orientation?
Your app needs these elements to support orientation well:
- Swap design width/height values based on orientation using formulas like
If(Parent.Orientation = Layout.Vertical) - Design for five key breakpoints: mobile-portrait, mobile-landscape, tablet-portrait, tablet-landscape, and desktop
- Set maximum widths to prevent UI components from stretching
- Use scrolling layouts to keep all elements available
- Keep user’s state intact during orientation changes
Offer Feedback and Microinteractions
Microinteractions act as silent conversations between users and interfaces that turn routine actions into meaningful moments. These subtle design elements boost app UX by a lot through instant feedback that acknowledges user actions.

Explanation of Microinteractions
Microinteractions work as trigger-feedback pairs where users can initiate the trigger (tapping a button) or the system can initiate it (meeting preset conditions). Dan Saffer defines them with four key components: triggers that start the interaction, rules that determine what happens next, feedback that tells users what’s happening, and loops and modes that control the interaction’s duration. These focused animations make products more user-friendly and help users participate while reducing their mental load.
Real-life example of Microinteractions
Duolingo uses microinteractions brilliantly through gamified surveys that ask “How fun was this?” with emoji ratings after lessons, getting an impressive 50% response rate. Asana shows a flying unicorn animation when tasks are done, which mixes useful feedback with fun gamification. Google’s search autocomplete shows suggestions that match searches instantly, helping users find information faster.
How to use Microinteractions?
Your mobile app UX design needs these key elements to work:
- Simple and focused interactions that serve specific functions
- Quick feedback that confirms user actions
- Strategic timing of microinteractions, especially after task completion
- Animations that boost rather than interrupt the user experience
- Visual feedback through color changes, animations, or progress indicators
Note that good microinteractions should feel subtle yet engaging—they turn everyday actions into memorable moments without cluttering the interface.
Design Mobile-optimized Forms
Mobile devices pose unique design challenges for forms, yet these forms remain crucial contact points in your app’s user experience. Internet usage on mobile devices now exceeds 60%, making optimized mobile forms a direct driver of conversion rates.
Explanation of Mobile Forms
Small screens and touch interactions demand specially designed input fields for mobile forms. These forms face different challenges than their desktop counterparts. Screen space limitations, finger precision issues, and various usage scenarios like walking or commuting all affect the design. The numbers tell the story – mobile forms achieve only 35.33% completion rates compared to desktop’s 50.8%. A mobile form’s success depends on finding the right balance between gathering information and working within device constraints.
Real-life example of Mobile Forms
Airbnb shows excellent mobile form practices through its responsive design that fits any screen size. Their efficient checkout process uses a single-column layout that users complete faster than multi-column formats, according to research. Shopify offers another great example – their progressive disclosure method breaks complex registration into smaller, manageable steps.
How to design Mobile Forms?
Your mobile forms will work better when you:
- Build single-column layouts that guide users’ attention downward
- Set touch targets at 44×44 pixels (9mm) minimum for easy tapping
- Use mobile features like camera scanning for credit cards and GPS location
- Split long forms into multiple steps with progress indicators
- Show passwords by default—hiding them creates more problems
- Match keyboard types to field requirements (numeric keypads for phone numbers)
- Place clear labels above input fields—never inside as placeholders
- Design responsive forms that work in any device orientation or size
Comparison Table
| UX Tip | Key Purpose | Implementation Methods | Real-life Example | Effect/Benefits |
| Simplify App Navigation | Create easy-to-use pathways for quick movement | – Keep menu items between 5-7 – Use clear labels – Make touch targets 44x44px – Group related items | Apple’s horizontal navigation bar | 38% of users look at navigation first |
| Focus on One Action per Screen | Cut down mental load and help users finish tasks | – Split complex tasks into smaller ones – Make primary action stand out – Show information gradually | Shopify’s onboarding process | More users complete forms |
| Cut Down UI Clutter | Help users stay focused | – Put important content first – Add more whitespace – Use 2-3 colors – Remove fancy elements | Apple’s clean interface design | Fewer errors and faster responses |
| Put Key Content First | Help users find what matters | – Show important info first – Make headers 3x bigger than text – Keep related things together – Use proper heading order | Airbnb’s category layout | Users scan and understand better |
| Design for Human Fingers | Make touch interaction easy | – Set 48×48dp minimum target size – Keep 8dp space between items – Map thumb zones – Give quick feedback | Instagram’s story interface | Fewer wrong taps and better accuracy |
| Stick to UX Standards | Make apps easy to learn and use | – Pick common icons – Put items where users expect them – Mix familiar with new | Airbnb’s design | Users learn faster and work better |
| Make Text Easy to Read | Help users read and understand | – Pick clear fonts – Keep lines 45-72 characters long – Set 1.5 line spacing – Use short paragraphs | Airbnb’s content layout | Bigger fonts lead to more sales |
| Speed Up Load Times | Keep users engaged | – Load content as needed – Shrink media files – Cut down HTTP requests – Use smart caching | Tinder’s PWA (61% faster loads) | Every 100ms faster brings 1.11% more conversions |
| Customize User Experience | Make each visit unique | – Learn from user data – Group similar users – Adapt to location – Build custom onboarding | Pinterest’s smart recommendations | Companies that customize well earn 40% more |
| Build Trust and Security | Keep data safe without hassle | – Ask for minimal permissions – Store data internally – Add biometric login – Show clear brand identity | Apple’s Trusted User Interface | Users trust more and stay longer |
Conclusion
These 20 UX design principles showcase everything in making ordinary apps into exceptional experiences. Simple navigation, reduced clutter, and faster load times affect how users notice and interact with your application. These go beyond esthetics and deliver measurable business results.
Note that great app UX comes from smart decisions at every level. Your design should accommodate human fingers and offer customized experiences. Each principle works with others to create an accessible interface that users love.
Developers often treat UX as an afterthought instead of a core part of product development. This approach ends up costing more through lost users, lower involvement, and missed conversions. The solution is to welcome these principles when you start designing.
Your first steps should focus on simple navigation, less UI clutter, and faster load times. As you progress, add sophisticated features like personalization and microinteractions. User involvement metrics will likely improve right away.
The best applications strike the right balance between creativity and convention, state-of-the-art and accessibility, visual appeal and functionality. Users don’t think about your clever code – they want to achieve their goals quickly without hassle.
Testing plays a vital role during implementation. Observe real users as they interact with your application. Find pain points and make improvements based on what you see. Nothing beats actual user feedback.
App UX design keeps evolving as users become more sophisticated. Notwithstanding that, these core principles stay relevant whatever technology or design trends emerge. Create experiences that value users’ time, abilities, and goals – the rest falls into place naturally.
So, which principle will you tackle first?
Key Takeaways to improve the ux
These 20 UX principles provide a comprehensive roadmap for transforming your app from functional to exceptional, directly impacting user retention and business success.
• Simplify navigation and reduce clutter – Limit menu items to 5-7 options and remove unnecessary visual elements to decrease cognitive load and improve task completion rates.
• Design for human interaction – Make touch targets at least 44×44 pixels, focus on one action per screen, and optimize for thumb zones to accommodate physical limitations.
• Prioritize performance and personalization – Optimize load times (100ms improvement = 1.11% conversion boost) and tailor experiences based on user behavior and preferences.
• Ensure accessibility and consistency – Design for all users with proper contrast ratios and maintain visual consistency throughout your app to build trust and familiarity.
• Implement feedback mechanisms – Use microinteractions and real-time support to acknowledge user actions and provide immediate assistance when needed.
Remember that exceptional UX isn’t about following every trend—it’s about creating intuitive experiences that help users accomplish their goals efficiently. Companies excelling at UX see 40% higher revenue, while poor UX costs businesses 35% of potential sales. Start with quick wins like navigation simplification and load time optimization, then gradually incorporate advanced features like personalization and community building.
FAQs
Q1. How can I simplify navigation in my mobile app?
Limit your main menu to 5-7 options, use clear labels instead of jargon, ensure touch targets are at least 44×44 pixels, and group related items logically. Consistent placement of navigation elements, typically at the top or bottom of the screen, also helps users navigate more intuitively.
Q2. What’s the importance of optimizing load times for mobile apps?
Optimizing load times is crucial for user retention and conversion rates. Even a 100-millisecond decrease in page load time can increase conversions by 1.11%. Implement lazy loading, compress images, minimize HTTP requests, and use caching to enhance your app’s performance.
Q3. How can I make my app more accessible to all users?
Ensure color contrast ratios meet accessibility standards (4.5:1 for normal text, 3:1 for large text), design touch targets of at least 44×44 pixels, support text resizing up to 200% without breaking layouts, and provide multiple feedback modes (visual, haptic, audio) for important actions. Also, test your app with assistive technologies like screen readers.
Q4. What are microinteractions and why are they important in UX design?
Microinteractions are small, purposeful animations or feedback mechanisms that acknowledge user actions. They enhance the user experience by providing immediate feedback, making the interface more intuitive and engaging. Examples include color changes when buttons are pressed or progress indicators for ongoing processes.
Q5. How can I design effective mobile forms?
Use single-column layouts, make touch targets at least 44×44 pixels, leverage mobile features like camera scanning for credit cards, break long forms into multi-step processes, provide appropriate keyboard types for different fields, and use clear labels above input fields. Also, ensure your forms are responsive and adapt to any device orientation or size.